Imagine your car’s radiator as the circulatory system of a living organism, tirelessly pumping essential coolant through the engine’s veins, maintaining a harmonious balance of temperature. Over time, however, this vital system can become afflicted with contaminants, rust, and sludge, akin to arterial plaque restricting blood flow. A radiator flush serves as a rejuvenating cleanse, purging the insidious grime to restore optimal functioning and longevity. Here’s how to embark on this transformative journey.
1. Preparation: Understanding Your Tools and Environment
Before delving into the intricate procedure of a radiator flush, gather the necessary tools—a small bucket, a radiator flush solution, a garden hose, and safety goggles. The garage or driveway becomes your operating theater, so ensure the area is well-ventilated and devoid of obstructions. Your car should be parked on a level surface with the engine cool to the touch, avoiding the surreptitious whispers of burns and scalds.
2. Safety First: Protecting Yourself and Your Surroundings
Don your safety goggles and gloves, the armor against the potential perils of spillage. Coolant can be a toxic substance; thus, it’s prudent to shield yourself from contact. Moreover, lay down an absorbent mat or old newspaper beneath your vehicle to catch any rogue drips or spills. The world of automotive maintenance requires a modicum of respect for both the vehicle and your health.
3. Drain the Old Coolant: The First Step in Rejuvenation
Engage with your vehicle by locating the radiator drain valve, often found at the base of the radiator. Position your bucket beneath this valve—a humble receptacle eager to absorb the tainted elixir of the engine. Open the drain valve cautiously, allowing the aged coolant to flow freely into the bucket, a dark river retelling tales of overheating episodes and mismanaged maintenance. Close the valve once the flow has ceased, sealing off the past.
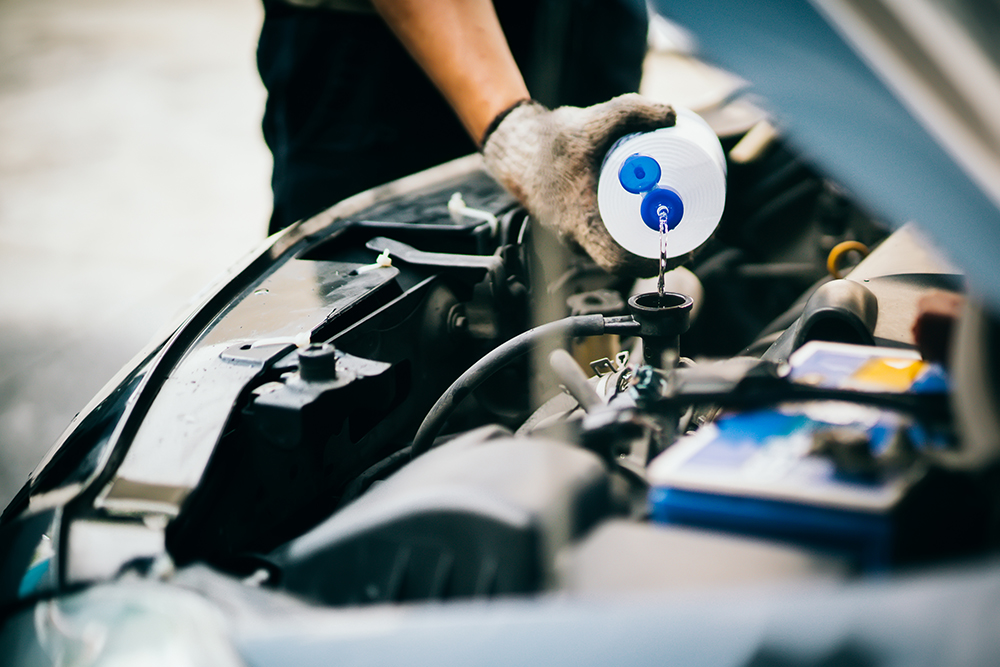
4. Introduce the Radiator Flush Solution
Pour the radiator flush solution into the radiator’s opening, akin to an elixir poured into a weary vessel. Its chemical magic works to dissolve stubborn deposits and corrosion built up over time. Follow the manufacturer’s instructions regarding the proportion and method of application. Close the radiator cap securely, embracing the promise of renewal.
5. Run the Engine: An Incantation of Renewal
Start the engine and allow it to idle for approximately 10 to 15 minutes. This is the moment of transmutation, where the solution circulates through the cooling system, engaging in a vigorous tango with the contaminants. The vibrations of the engine harmonize with the cleansing properties of the flush, preparing the system for rebirth. As the engine warms, the heater should also be turned on to ensure that the solution penetrates every crevice—every nook and cranny—of the system.
6. Embrace the Flush: A Flush of Fresh Water
Once the time has elapsed, switch off the engine and let it cool for several moments. Now comes the moment to cleanse. Attach a garden hose to the radiator’s fill neck or drain valve, allowing a gentle stream of water to flow through the system. Like a river carving its way through rock, the water washes away the remnants of the flush solution and any residual grime that may still linger. Allow the water to flow until it runs clear, a serene indication of success.
7. Refill with New Coolant: The Lifeblood of Your Engine
Retire the garden hose, replacing the drain plug if it was removed. It is now time to introduce fresh coolant—the lifeblood that will sustain your engine’s health. Follow the manufacturer’s specifications for the type and mix of coolant, as it’s not merely a beverage, but a critical concoction designed to combat freezing and overheating. Pour it into the radiator slowly, watching as it fills the reservoir, an act of nourishment and care.
8. Burping the System: Eliminating Air Pockets
Engage the process of ‘burping’ your cooling system, an essential step to eradicate air pockets that may have infiltrated during the flush. With the radiator cap removed, start the engine once again and leave it running until the thermostat opens. As the engine reaches operating temperature, you may observe bubbles emerging. This is the system expelling the air, culminating in a symphony of operational prowess. Once the bubbles cease, replace the radiator cap securely, sealing your work with a promise.
9. Final Check: Ensuring a Radiant Readiness
After allowing the engine to cool, perform a cursory inspection of all connections and hoses for any signs of leaks or unusual wear. This final check is akin to a surgeon reviewing their handiwork before allowing a patient to awaken. It ensures that your labour is not only fruitful but also secure.
10. The Benefits of a Radiator Flush: The Gift of Longevity
A comprehensive radiator flush imbues your vehicle with renewed vigor, enhancing its efficiency and prolonging its lifespan. Like a maestro conducting an orchestra, you now command the symphony of components working in perfect harmony. With this revitalized cooling system, your engine is primed to tackle the road ahead, rain or shine.
In conclusion, understanding and executing a radiator flush not only enhances your vehicle’s performance but also deepens your connection to the machine that serves you. Just as one might treat their body with care to promote vitality, so too should one extend that sacred regard to their automobile. The road awaits, and with a freshly flushed radiator, your adventures beckon.